
Installation Guide
Install StoreVoiceAI on your WooCommerce store
Follow these steps from your own WordPress dashboard to search for StoreVoiceAI, install the plugin, activate it, and complete onboarding.
Before you start
This guide is for store owners who want to add the StoreVoiceAI plugin to their WordPress and WooCommerce website.
WordPress admin access
You need permission to install and activate plugins on your store.
WooCommerce installed
Your store should already have WooCommerce installed and active.
Install the plugin from your dashboard
Use the screenshots below as a guide. Your WordPress dashboard may look slightly different, but the process is the same.
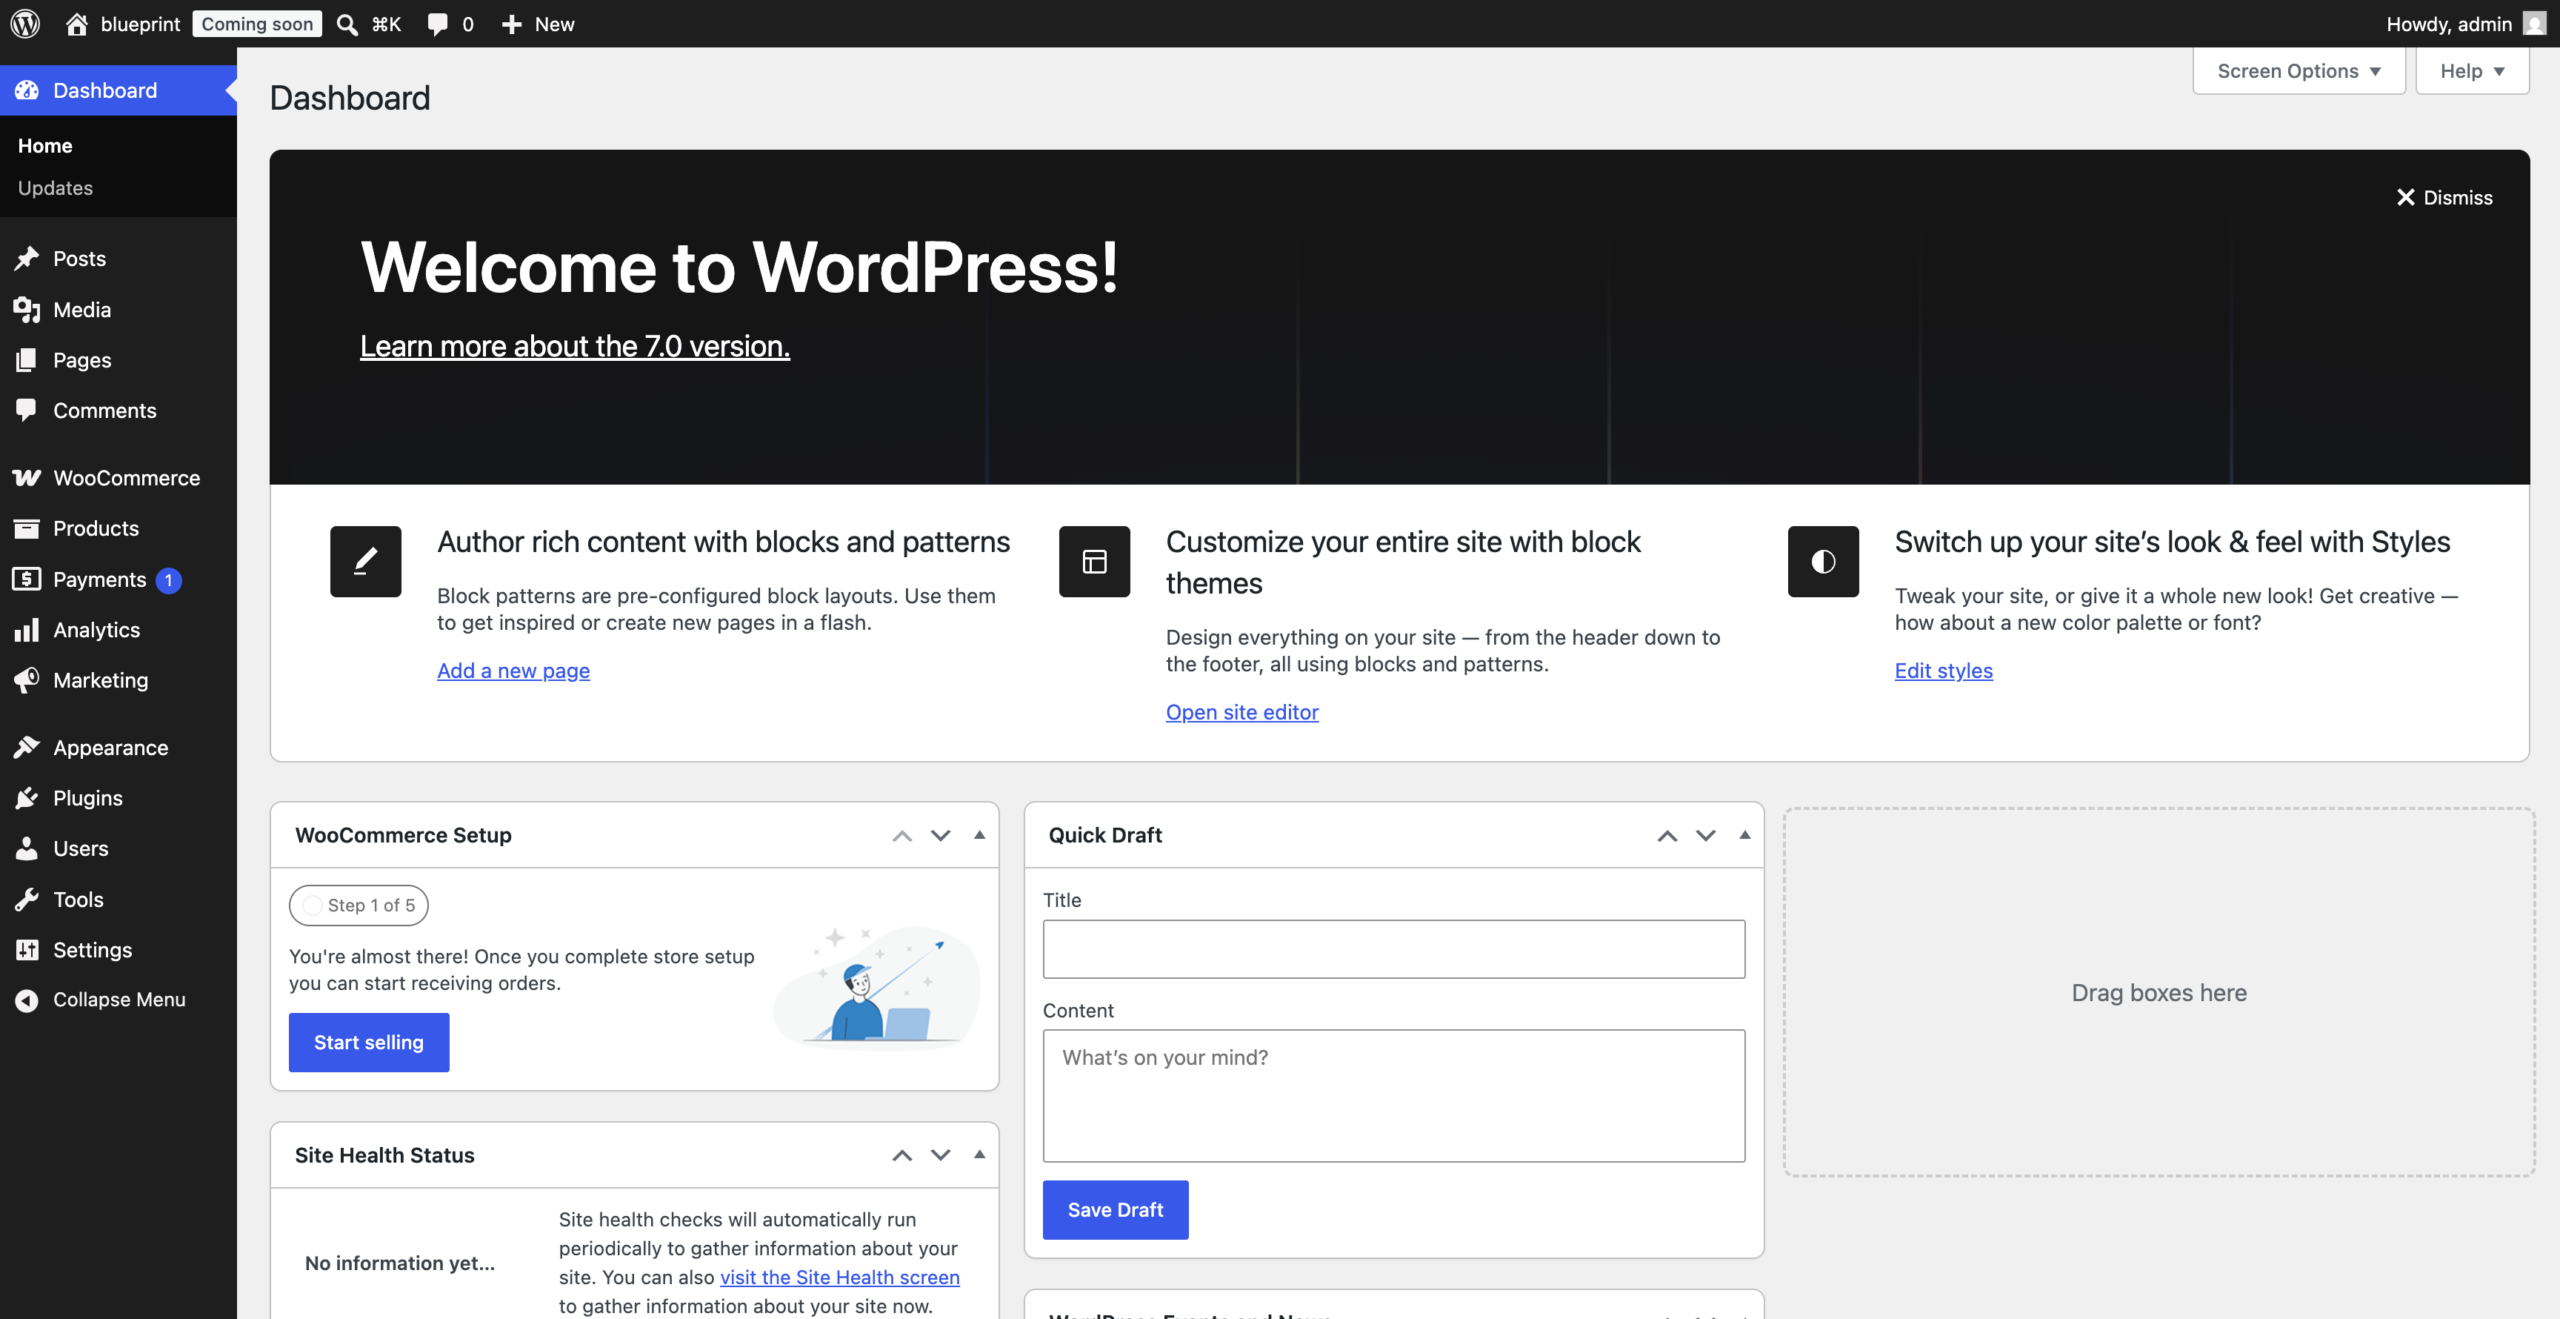
Start from your WordPress dashboard
Log in to your store admin area. This is usually your website address followed by /wp-admin. For example, yourstore.com/wp-admin.
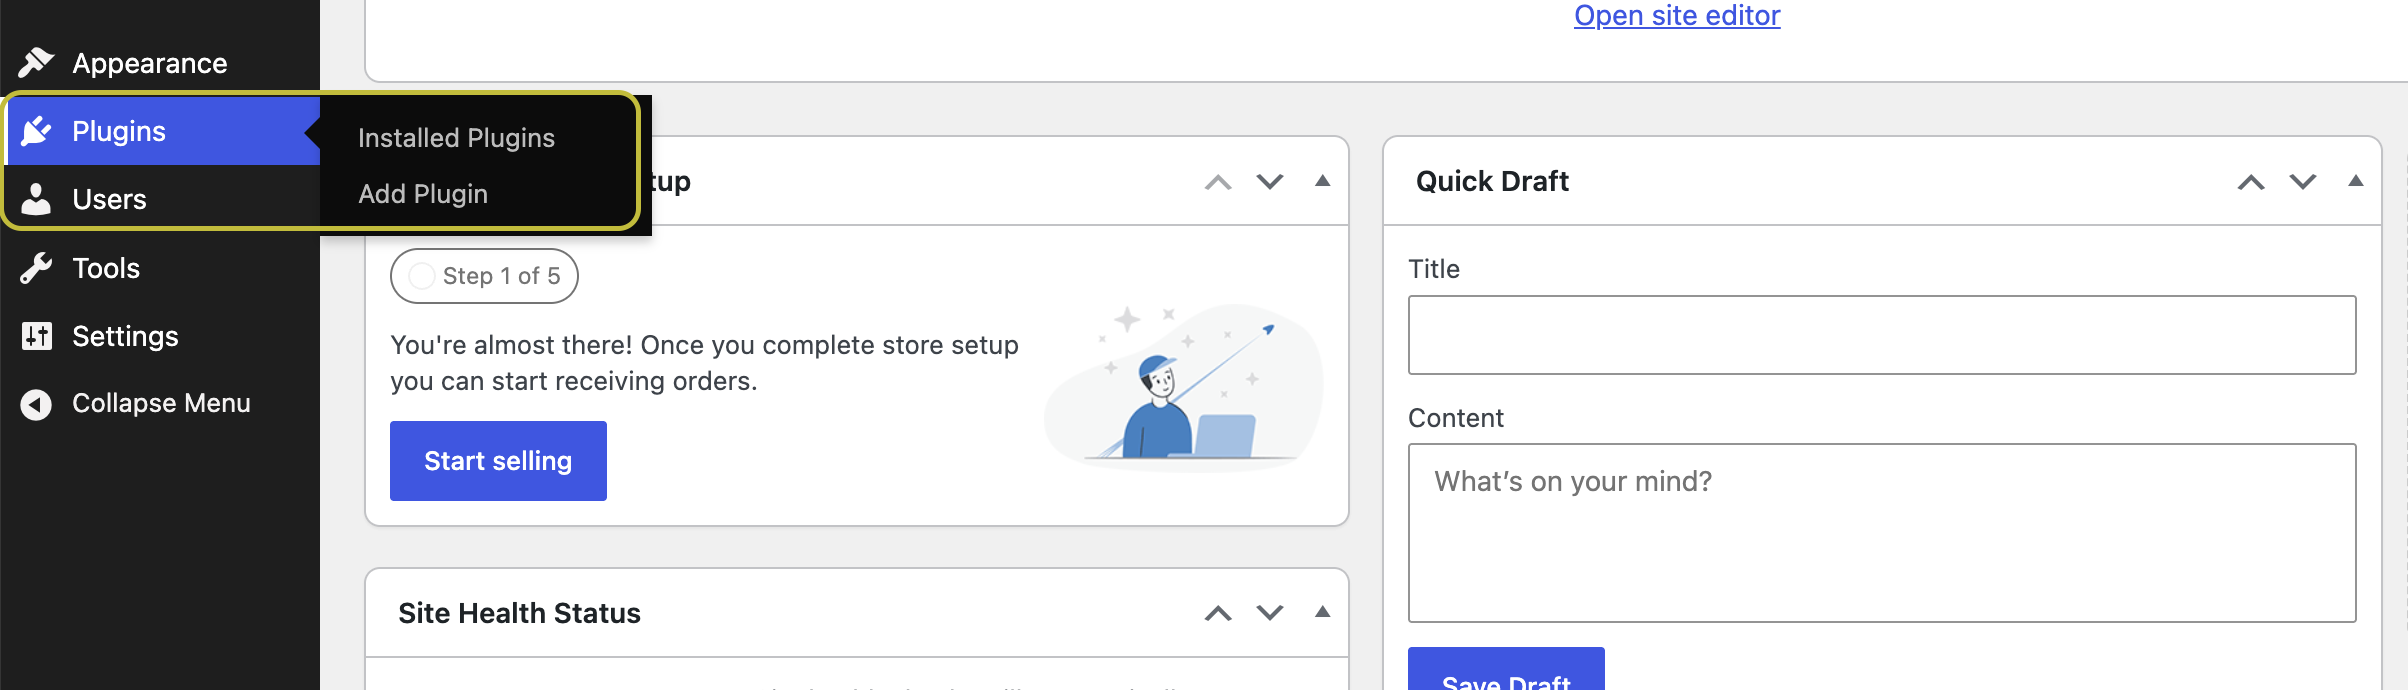
Go to Plugins
In the WordPress sidebar, find and click Plugins. This opens the area where you manage installed plugins on your store.
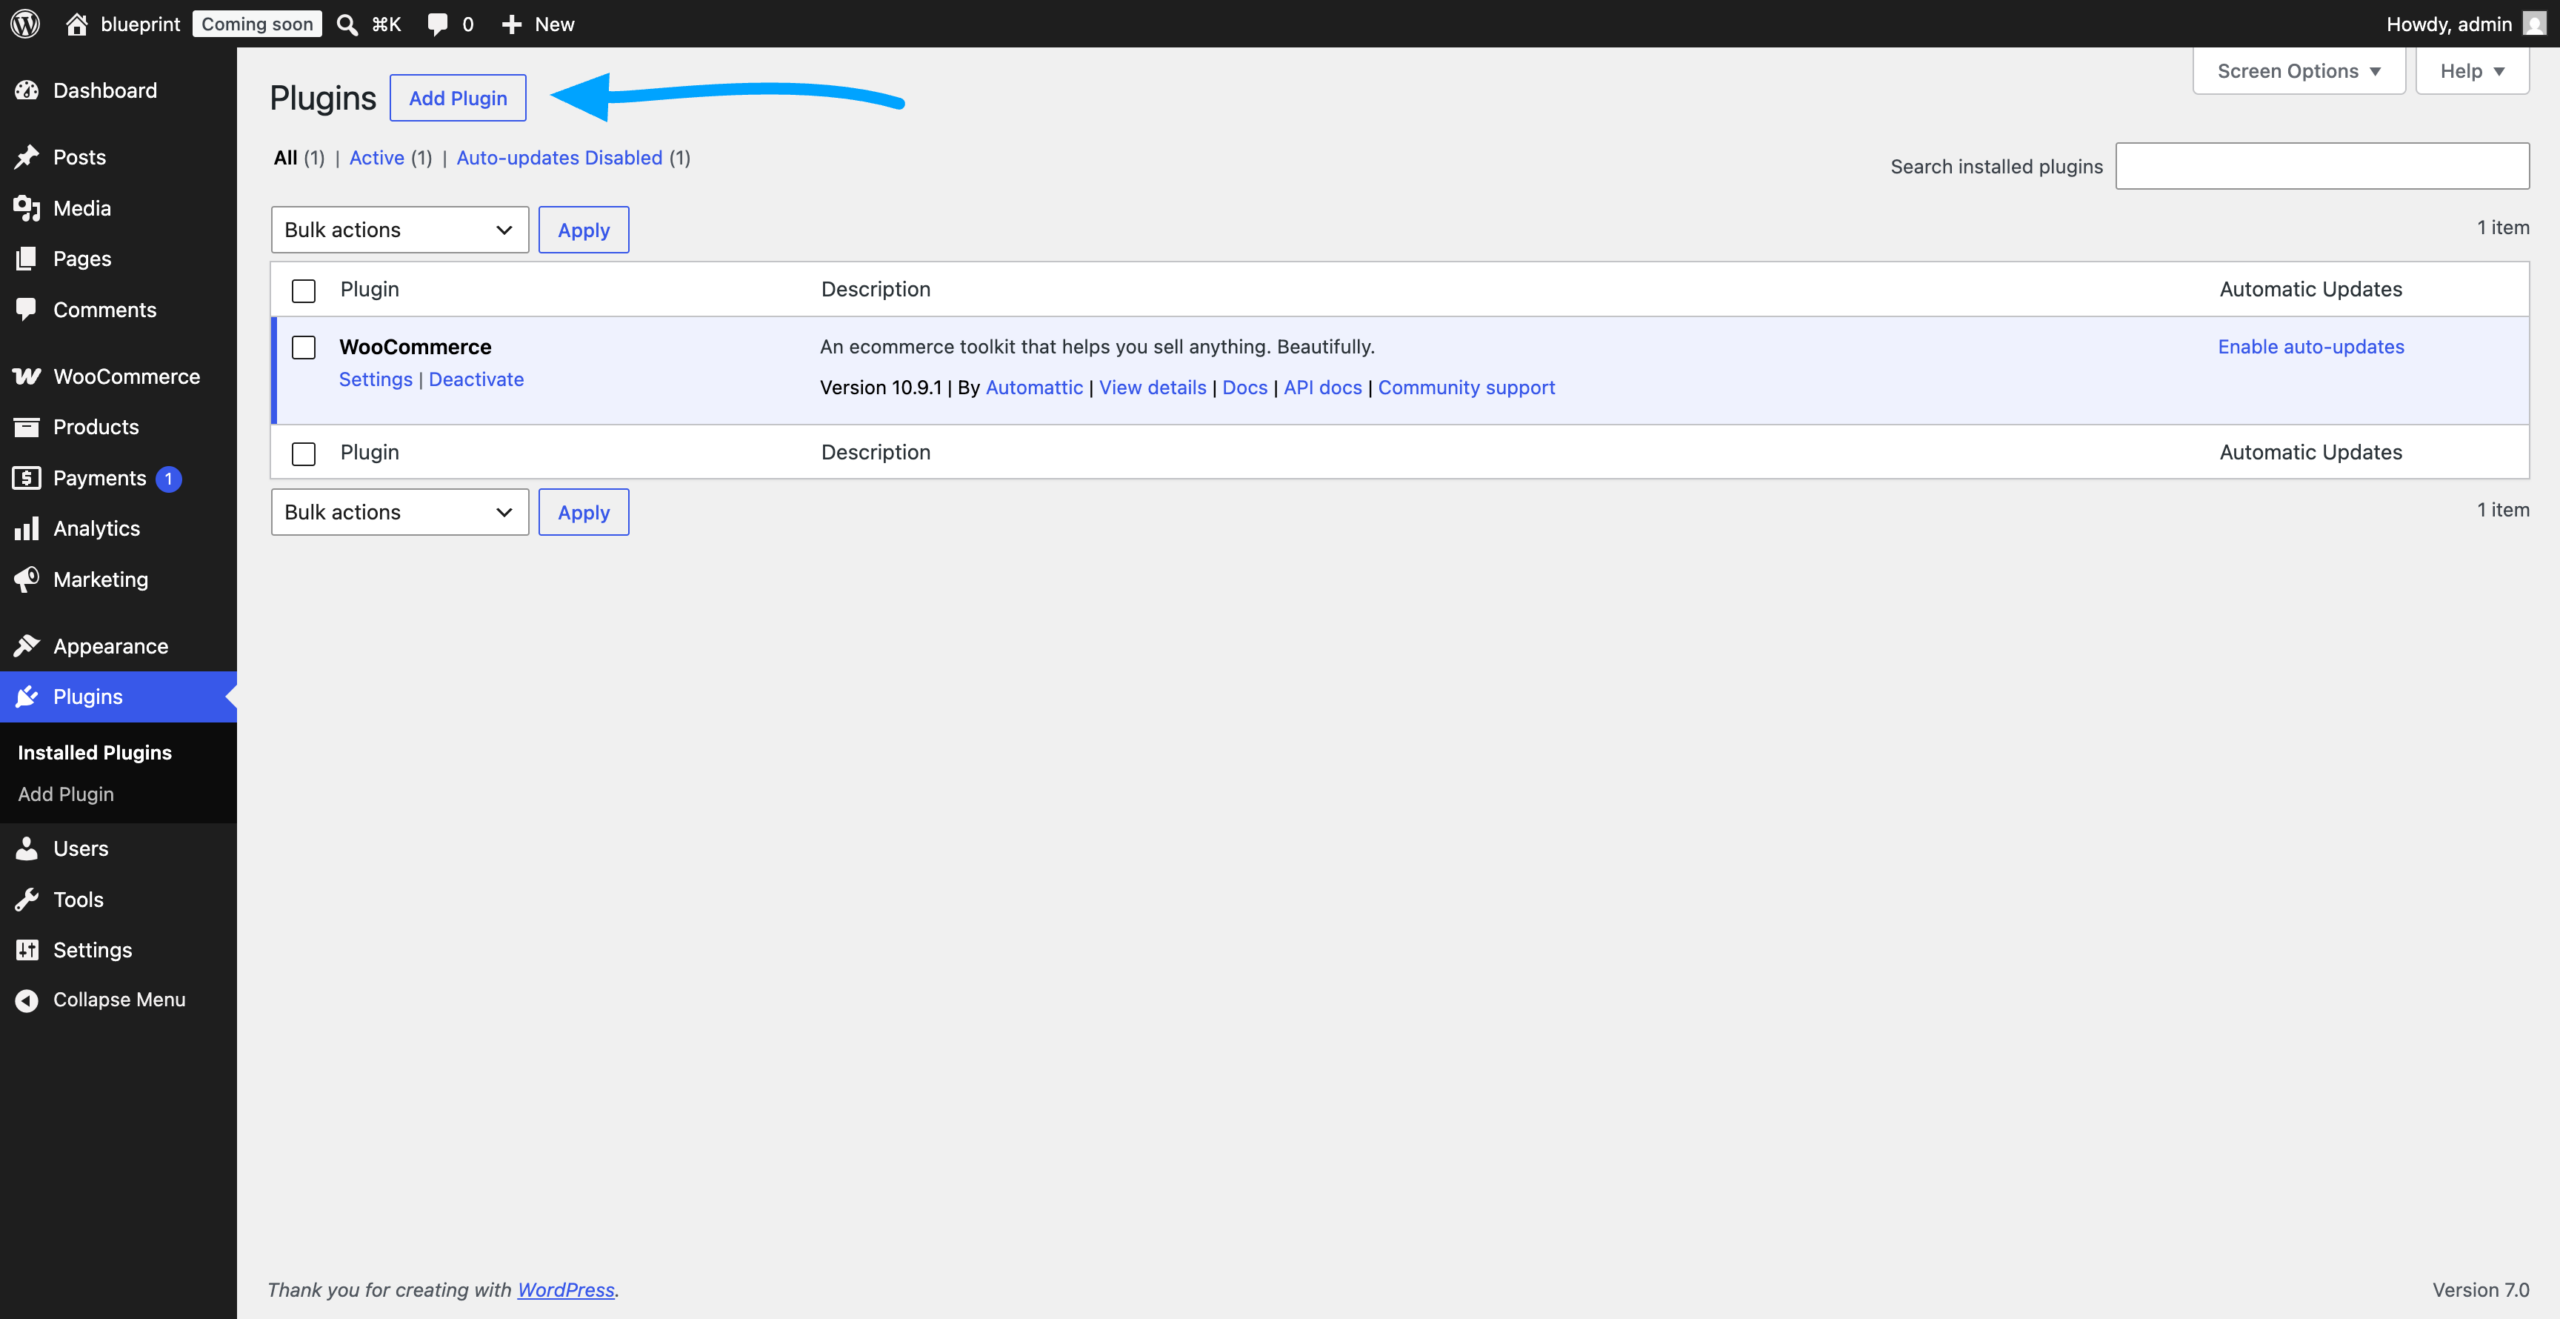
Click Add Plugin
On the Plugins page, click the Add Plugin button at the top. In some WordPress dashboards, this button may appear as Add New.
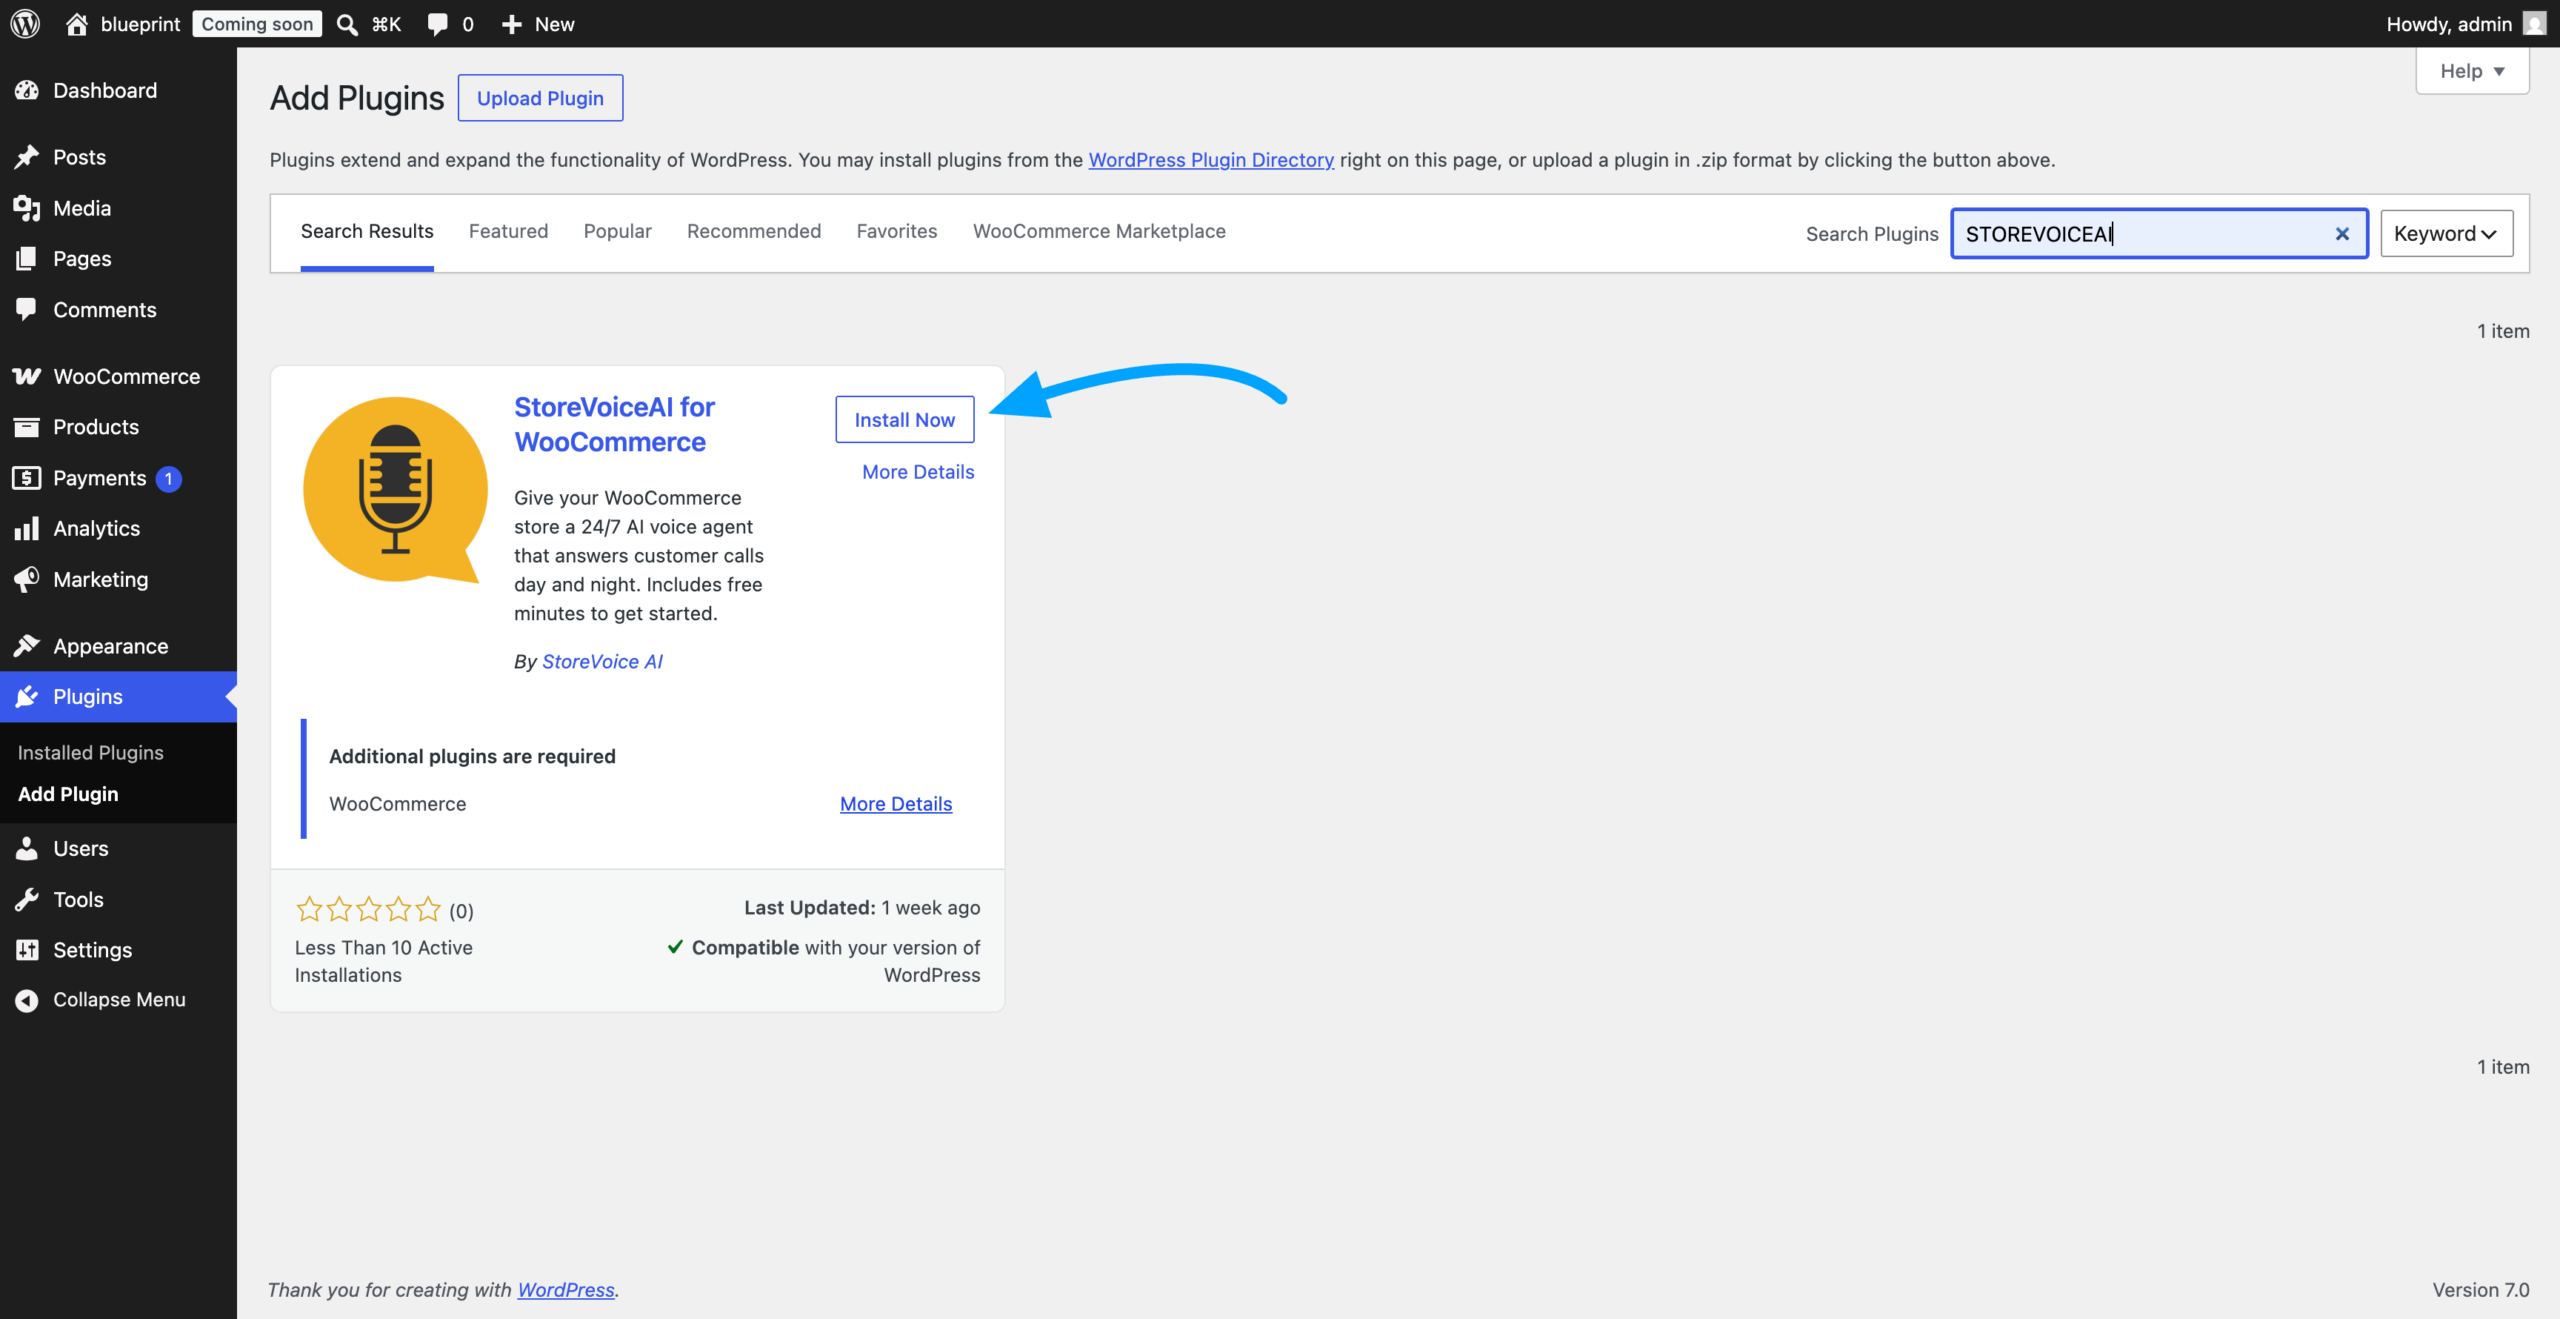
Search for StoreVoiceAI and install it
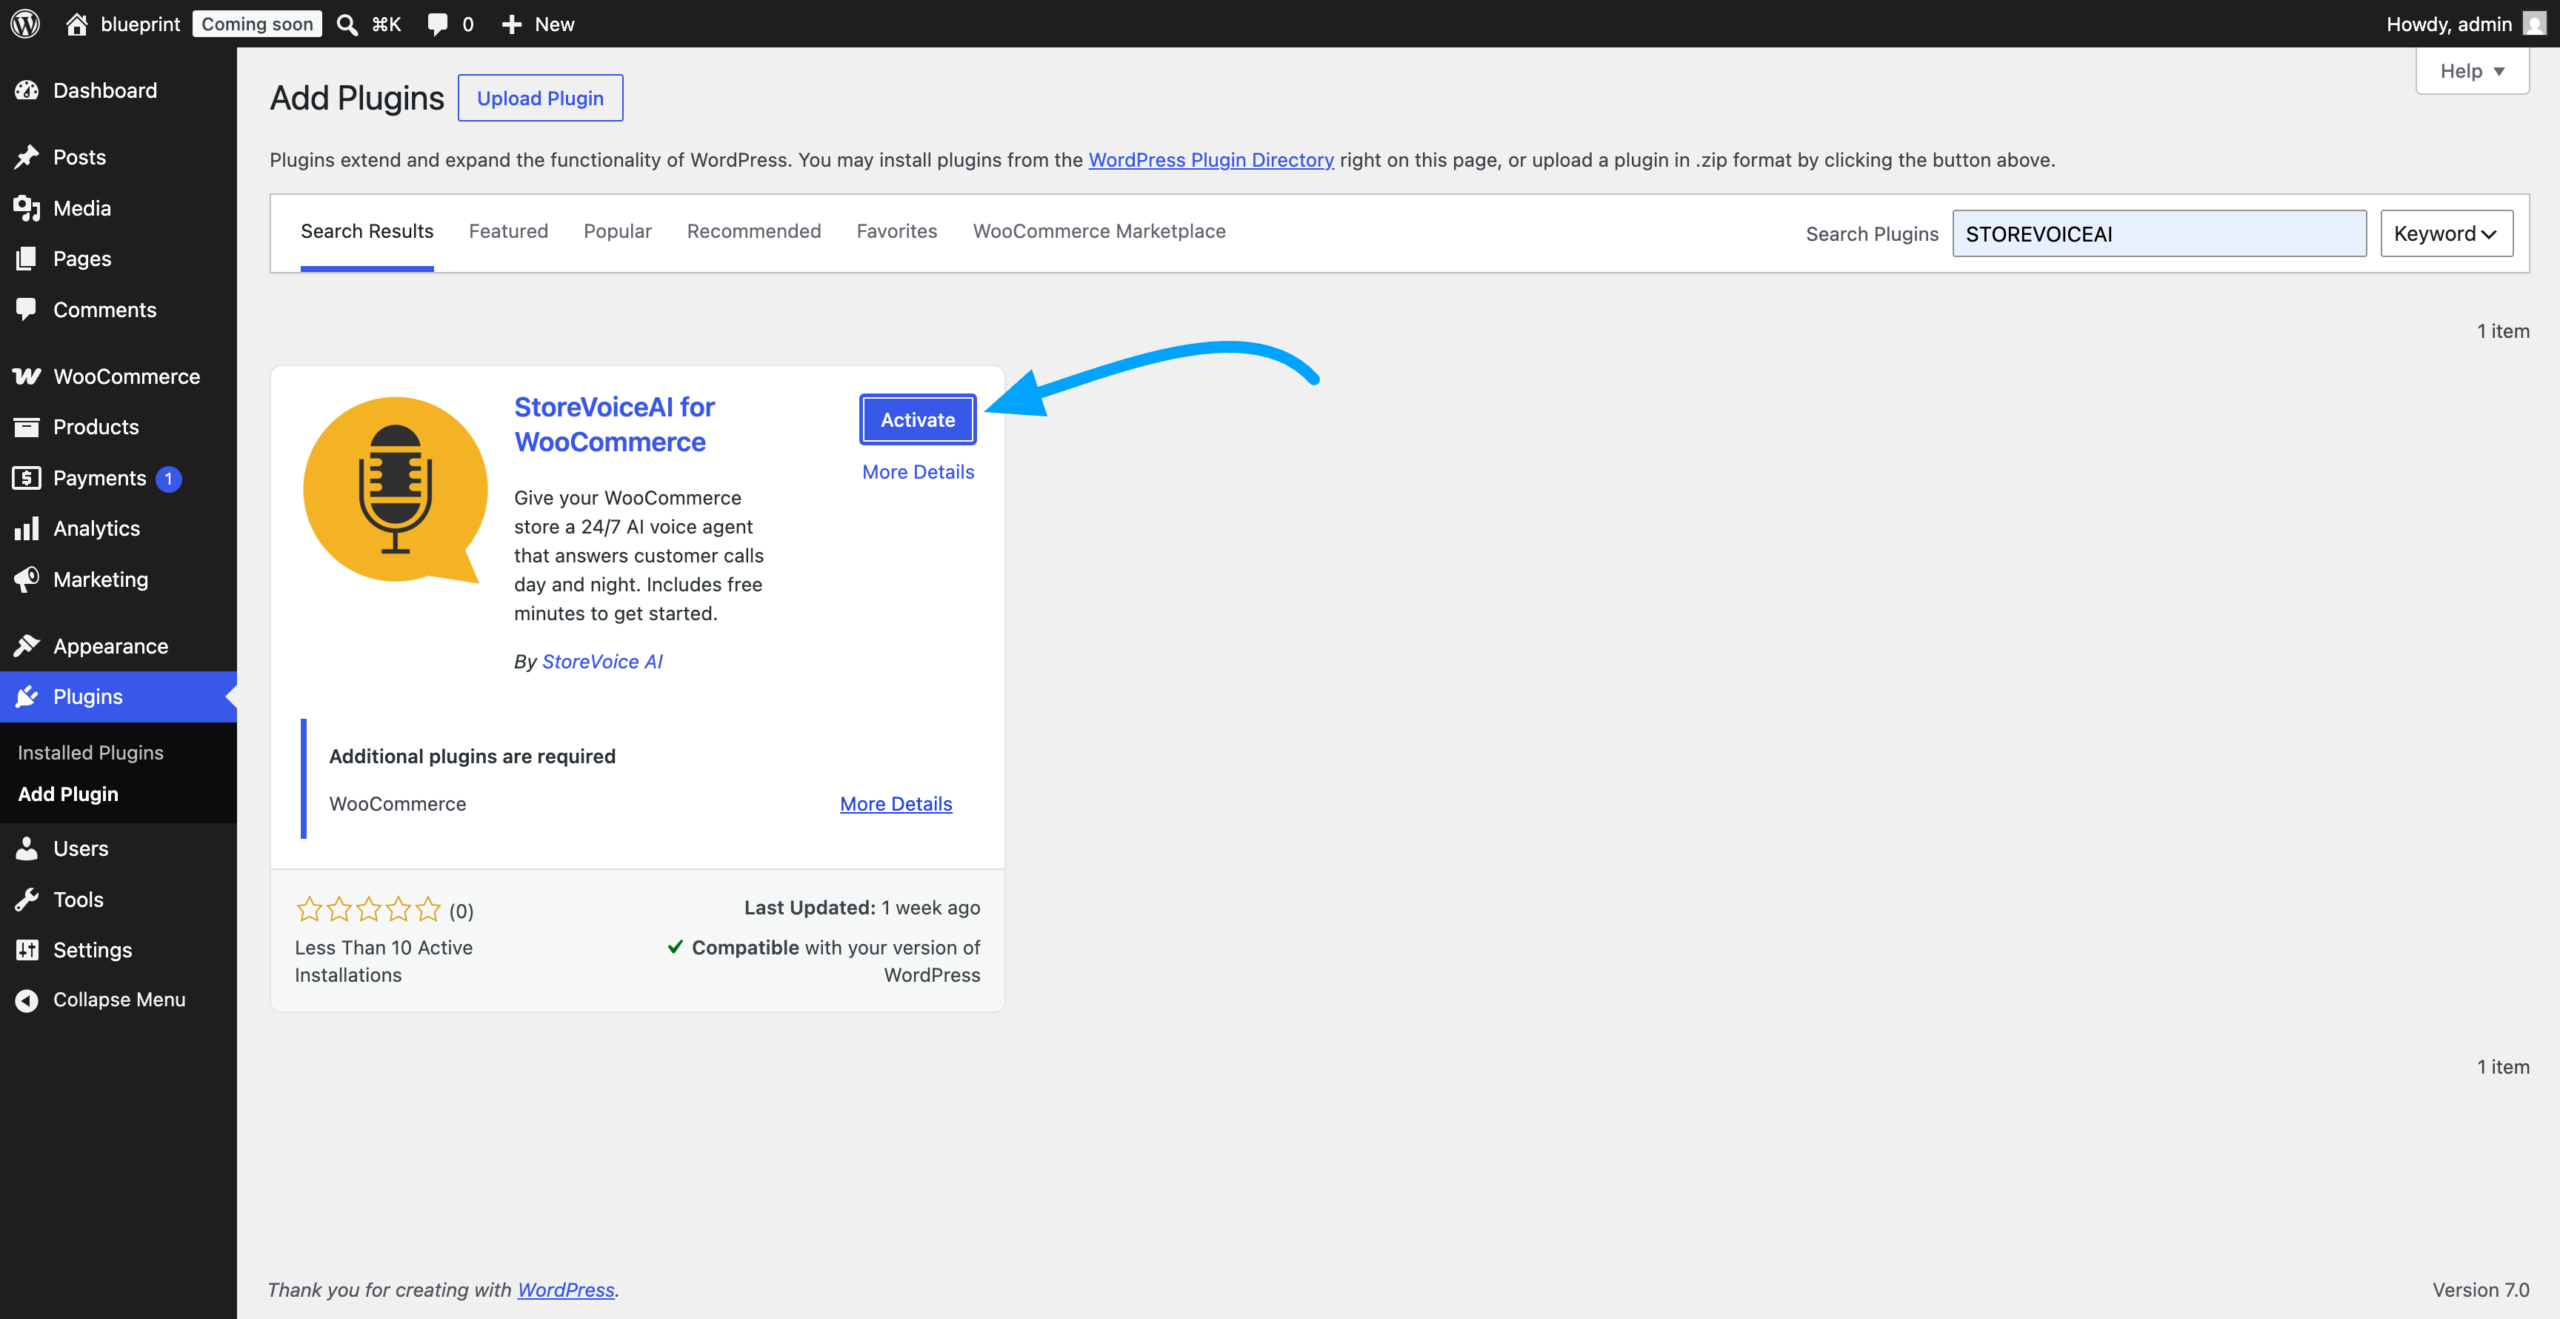
Use the search box and type StoreVoiceAI. When you see StoreVoiceAI for WooCommerce, click Install Now.
Activate the plugin
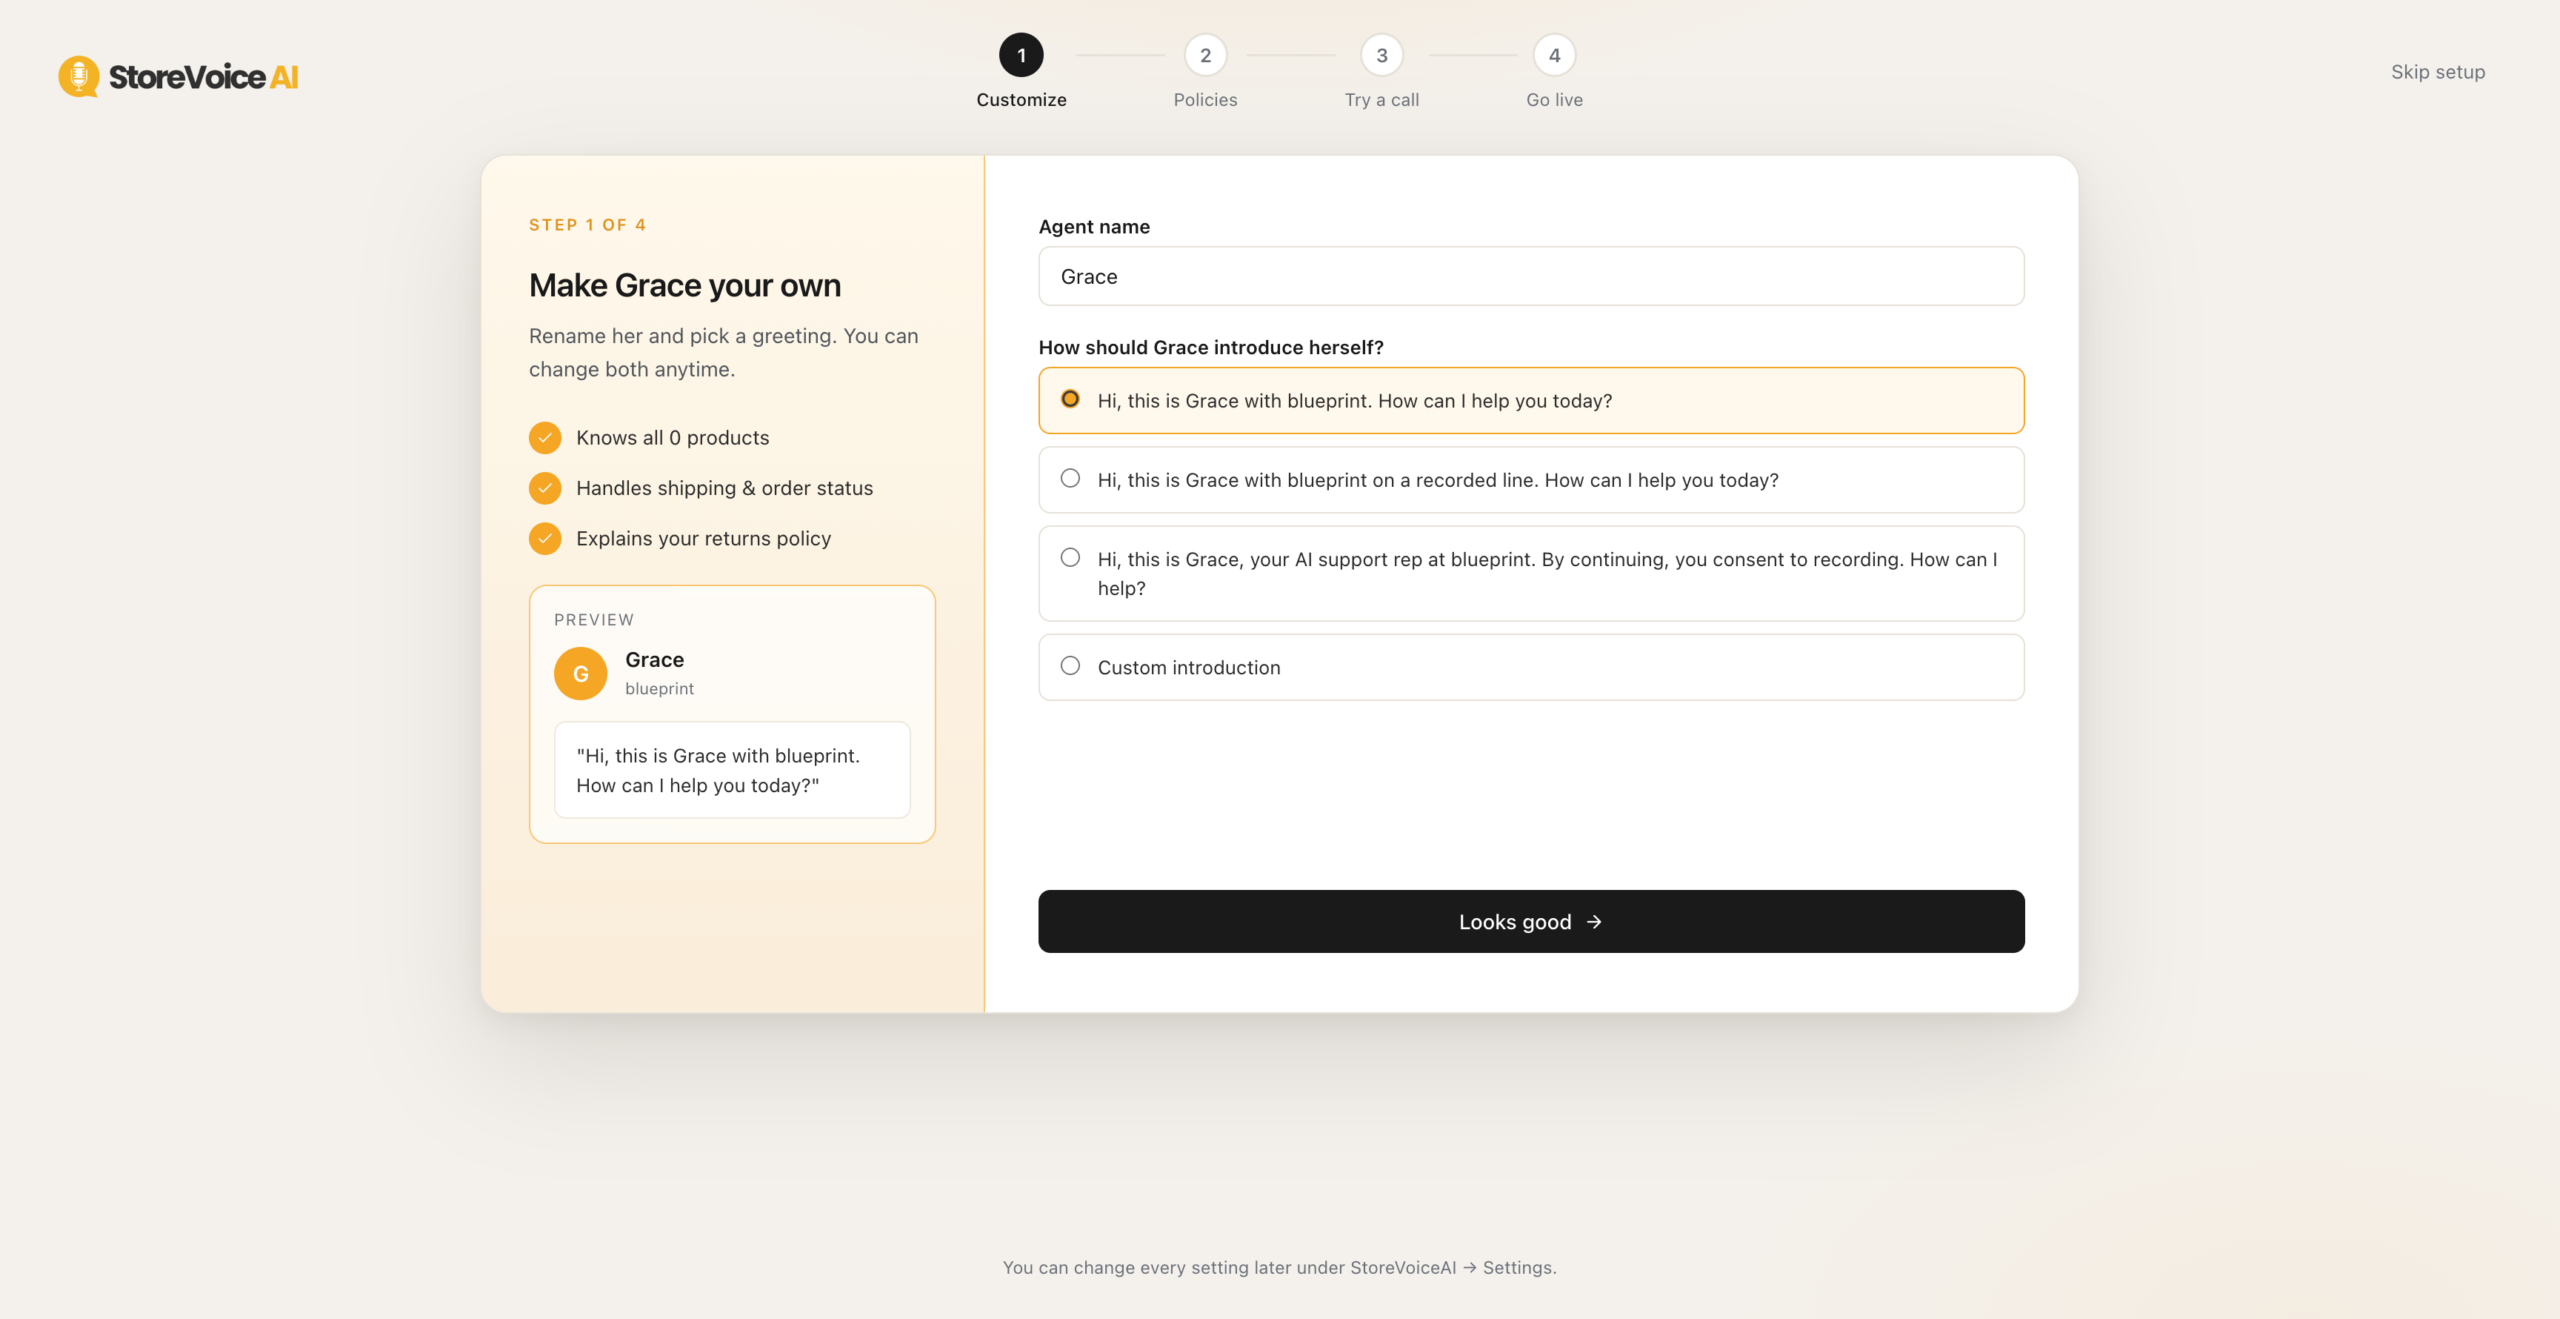
After installation, the button will change to Activate. Click it to enable StoreVoiceAI on your WooCommerce store. After activation, WordPress will automatically take you to the StoreVoiceAI onboarding screen.
Complete the StoreVoiceAI setup
Follow the onboarding instructions shown after activation. This connects your WooCommerce store so Ava can use your products, store policies, and support information.
Need help with installation?
Visit the demo store to see how Ava works after setup, or contact support for help connecting StoreVoiceAI to your WooCommerce store.